Compiling SASS and minifying JS and CSS with ASP.NET Core
When working on my Link Shortener (coming soon!) project, I decided that using normal CSS is tedious, so I wanted to use SASS. But I didn’t want to compile it manually, so I ventured onto finding the solution that is ideal for me, and is easy to add at once - much easier than other tutorials I found online.
What is SASS
SASS (Syntatically Awesome Style Sheets) is an extension language for CSS, that aims to extend CSS with features like inheritance, nesting, multi-file modules or even maths - making CSS much less dreadful at once. Considering how annoying and unmaintainable CSS can get, it makes SASS one of the best ways to style your website.
Unfortunately, SASS has one significant issue - it is not natively supported by browsers. This means it needs to be converted (“compiled”) to CSS before publishing your website.
What is Minifying
Ideally your code and markup should be as readable and expressive as possible. Variable names should be self-explaining, code lines should be separated, { and } brackets should be on new line (depending on your language’s code style) etc. These rules should be followed as they increase maintainability, helps with debugging and makes working with the project much less painful.
Unfortunately such approach means more letters. More letters means more bytes. And more bytes to transfer is not good for websites (or your visitors’ experience). For that reason it is recommended to “minify” your CSS and JS files.
Minifying process essentially converts your neat and highly readable files into obfuscated and ugly but much smaller .min.css and .min.js files. Your old files stay intact as minified files are created in addition to your well-formatted files - your website simply instructs browsers to download the minified files instead of normal files, reducing network traffic.
Doing it in ASP.NET Core
ASP.NET Core projects do not support SASS or minifying out of the box. But as you can see, both have huge benefits - so let’s make our project support them both.
For this reason I did my research and found the approach that works for me, and is also quite simple to follow. Read on!
Project preparation
First, let’s do some preparation of our project itself - don’t worry, there isn’t much to change!
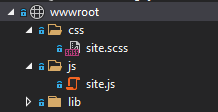
This guide assumes that your project has wwwroot directory, that contains css and js directories. It’s okay if it doesn’t - but you’ll need to make the changes as you follow the steps accordingly. Default ASP.NET Core projects might also create wwwroot/lib directory, but it’s okay - we’ll make our process ignore them.
What you need to do is rename your site.css file into site.scss. The exact file name might be different for you, the important thing is that we change .css extension into .scss. A valid CSS file will also be automatically a valid SASS file, so you can do it without worry - it will just work.
WebCompiler
Now we need a tool. Some tutorials I found suggest using Mads Kristensen’s WebCompiler. Unfortunately this tool seems to be abandoned and not worked on anymore. 😞
Luckily other programmers stepped in - one of them being excubo-ag with their own great version of WebCompiler. As of date of this post, it is still actively supported and works perfectly well, so let’s install it! The project’s README explains ways to install, but for the sake of this tutorial, let’s go with global installation method:
| |
Next step is to create a configuration file. This is actually optional, but it is always useful to be able to customize the process if you want to. Navigate to your project’s directory, and run following command:
| |
This command will create a new webcompiler.json file with default configuration. Feel free to customize it as you see fit! I personally set GZip to false, but you’re welcome to do anything that fits your needs.
Now your can run webcompiler in your project’s directory using 2 commands:
| |
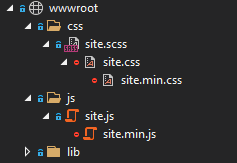
webcompiler -r wwwroot -c webcompiler.json. The reason why I run 2 more explicit ones is that my project has a wwwroot/lib directory that I don’t want WebCompiler to touch. If you don’t have it (or simply don’t mind) you can run just one command in this and all of the following examples.Once the commands execute successfully, the project will now have additional files:
Using the minified files
Now we just need to make our website actually use the minified files. To do so, go to the location where your project references your CSS and JS files. This location might vary depending on the project type and any modifications made to it. In case of Razor Pages, the files are referenced in Pages/Shared/_Layout.cshtml by default. There you can simply change extensions of references CSS and JS files from .css and .js to .min.css and .min.js, respectively.
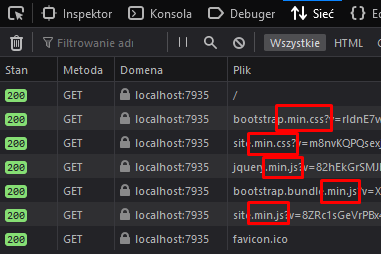
If you now run the project, enter browser dev tools (F12 for me), go to Network tab, and force refresh the website using (Ctrl+F5 for me), you should now see that .min.css and .min.js files are being loaded, but the website still looks nice. Great!
Non-minified for Debugging
This should be enough to make our website use minified files, but we can go a step further. Debugging non-minified files is much easier, so why don’t we make our project use non-minified versions when we’re running in Development environment?
To do this, we first need to inject IWebHostEnvironment service to our file. You can do it in the same file that is referencing the CSS and JS files, or you can do it in your shared imports file (in Razor Pages: Pages/_ViewImports.cshtml). I personally chose to use the latter so this service is accessible in all of my pages, but the code we need to add is the same - simply add following line somewhere at the beginning of your chosen file:
| |
Great, now you can use HostEnvironment in your file, so you can check the environment using Razor C# syntax. The idea is simple - if environment is Development, then reference non-minified files, otherwise use minified ones. Example from my Link Shortener project:
| |
Lastly, to ensure that project runs in Development environment when ran through Visual Studio, it might be worth adding ASPNETCORE_ENVIRONMENT environment variable in your Project Debug settings. To do so, make following changes in your launchSettings.json file:
| |
If you do not have launchSettings.json file, you can also add variables using VS menus. Go to Project -> 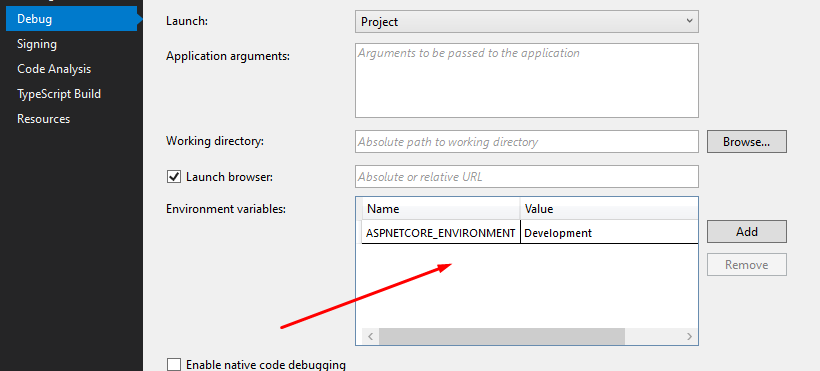
Excluding from git
From now on you’ll be working exclusively on .scss and .js files. However, git by default will still include them in your repository. They are not needed there, since they’re generated by a tool (which we’ll fully automate in a moment). For that reason, it might want to exclude CSS and minified files from the repository.
To do so, edit .gitignore file at the root directory of your repository (if it doesn’t exist, simply create it) and add following lines to the file:
| |
The above snippet will ignore all minified CSS and JS files, and site.css specifically. You might also ignore all **.css files, but I chose not to in case I want to use non-SASS CSS for some specific file at some point.
Automating the Process
So we now have a full support of SASS and minifying in our project, which is great. However running these commands manually on every change is annoying. Excubo.WebCompiler’s README suggests modifying your .csproj to run webcompiler on every build - in our guide, the modification would look as follows:
| |
Now that’s a huge improvement over manually triggering the commands, and would even work with CI/CD pipelines. Unfortunately this approach has one major issue: when you run the project via Visual Studio and none of the non-static files has changed, it will not rebuild the project - so WebCompiler will not run! You could manually trigger full rebuild whenever you change CSS/JS, but that’d be really annoying.
The answer to that issue is using a file watcher. Unfortunately I had issue getting dotnet watch to work with webcompiler, and I also didn’t want to keep batch files or typing command every time I start working on my project again. For that reason I created a tool called fsriev.
fsriev
fsriev is a .NET Core-based file watcher for Windows and Linux. It is designed to be fairly customizable, can watch multiple directories at once, run multiple commands on a file change, and supports exclusion filters. It also uses Microsoft.Extensions.Configuration, which means that it can be configured in a large variety of ways. The recommended way is to use the config file - once it is configured, you can simply add shortcut to fsriev.exe to your Desktop or Start menu and run it with a single button click!
So, let’s download the latest version of fsriev from here. If you have .NET 5 Runtime installed, download portable version - otherwise download one of OS-specific packages. Once download is completed, extract the zip package to the location where you want to keep fsriev “installed”.
Once extracted, we need to edit the config file - so open appsettings.json with your text editor. fsriev configuration is documented in its README. In this guide, the configuration I use for my Link Shortener project will serve us an example:
| |
Once done with the configuration, save the file and run fsriev. Once it’s running (and no errors are displayed), go to your SASS or JS file, and make any change, and then save the file. fsriev should automatically run the commands for you:
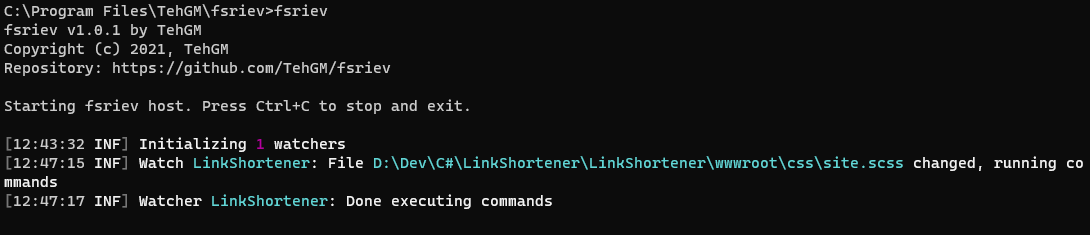
Now as long a fsriev is running, whenever you make any change to your SASS or JS file, all you need to do is restart the project, without having to worry about compiling SASS or minifying CSS and JS.
Integrating with CI/CD
If you’re using a build pipeline like GitHub Actions or Azure DevOps Pipelines, there’s a few more steps needed. But don’t worry, they’re simple!
If you installed Excubo.WebCompiler globally, you need a task to run a command to install it before running build task of your pipeline.
If you didn’t edit your .csproj file to run WebCompiler on build, you also need a task that runs webcompiler -r YourProject/wwwroot/css -c YourProject/webcompiler.json and webcompiler -r YourProject/wwwroot/js -c YourProject/webcompiler.json.
Once these commands are run, you can proceed with with building the project. You can also add a task to remove any .scss file before publishing, but that’s completely optional.
Summary
I hope this guide shows the easiest way to automate SASS compilation and CSS and JS minification in your ASP.NET Core project. This is the approach I found to be the easiest (well, besides the need to create fsriev - but you won’t need to do that!), and I use it myself.
If I find any improvements or errors, I’ll update this guide accordingly. I’ll also do so if fsriev changes any significantly - and I’ll be aware of it, as it’s a tool I made myself.