Publishing NuGet packages with GitHub Actions
Recently I wrote a post on automating DocFX with GitHub Actions. Now it’s time to use similar automation to publish NuGet packages!
What is NuGet?
NuGet is a package manager for .NET. It allows to easily resolve dependencies in your .NET projects, manage their versions and so on, reducing the dependency hell when compared to manually managing DLL files.
The main way to share NuGet packages is nuget.org NuGet Gallery, which is maintained by Microsoft. This however isn’t the only NuGet repository out there. There are many other repositories such as GitHub Packages or MyGet, and you can even set up a local folder as a repository and store your packages there!
What are GitHub Actions
GitHub Actions are CI/CD workflows that are integrated directly into your GitHub repository. They can be ran manually or automatically on certain events (such as push to a branch or a Pull Request being opened). If Action is triggered by a Pull Request, GitHub will automatically start the action, and will prevent merging the PR until all actions are successful (unless you’re an admin on the repository - then you can force merge).
GitHub Actions are free to use for public repositiories.
Creating a NuGet Action
There’s an existing publish-nuget by rohith, but after looking at its source code, I had an impression that this action would only work with nuget.org. For this reason, I’ll explain how to build an action that is repository-independent.
--source <your-source> argument in your push command!Requirements
I assume that you already have your project code ready and in a github repository. I also assume that you have an account in your chosen repository if it requires it - nuget.org does!
Creating auth token
NuGet repositories usually require an authentication token to publish. And that’s good - we don’t want everyone to be able to publish our packages updates, that’d cause chaos!
So, let’s create the token and add it to our repository so our GitHub Action can use it.
${{secrets.NUGET_TOKEN}} with ${{secrets.GITHUB_TOKEN}}.Creating token on nuget.org
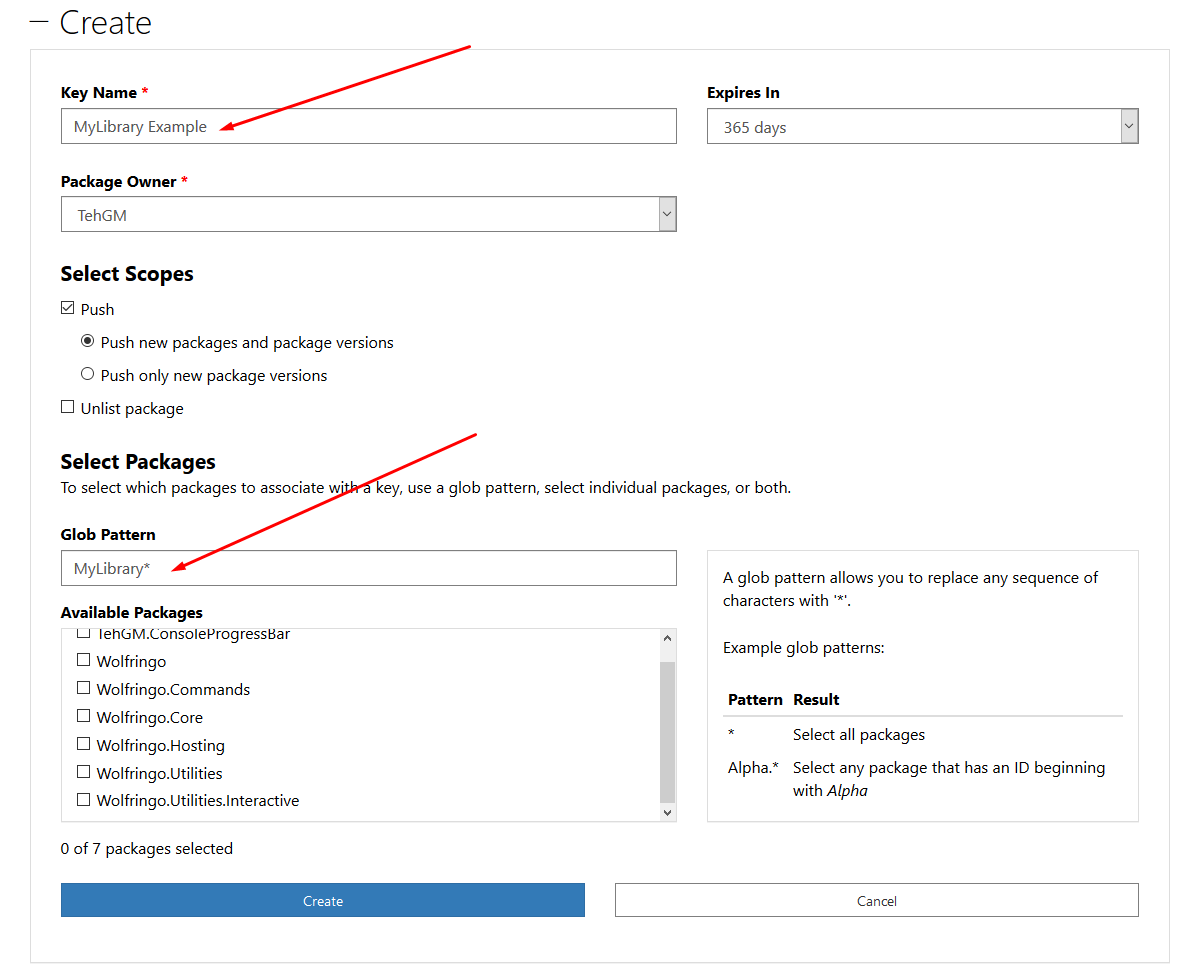
To create a token on nuget.org, first login to your account. When logged in, go to API Keys and click Create. Here you will need to input key name and select packages (you can use glob pattern). When all data provided, press blue “Create” button.
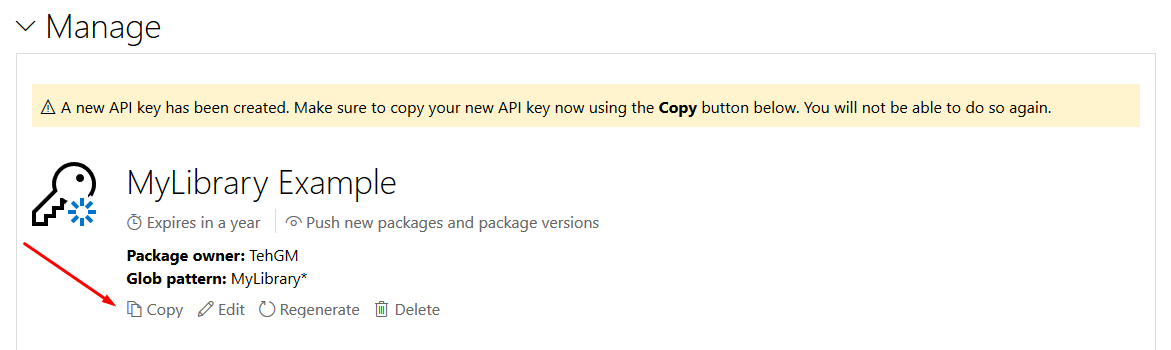
Once created, you need to copy the new token. Keep it somewhere safe for the time being - we’ll need to add it to our repository in a moment!
Adding Token to GitHub
GitHub repositories can store secrets. These secrets are stored in a secure manner - no one is able to see them, and they’re injected into Actions only when they’re being executed. This is the perfect place for our nuget.org auth token.
Go to your repository Settings, then Secrets. To add a new secret, press “New repository secret” button.

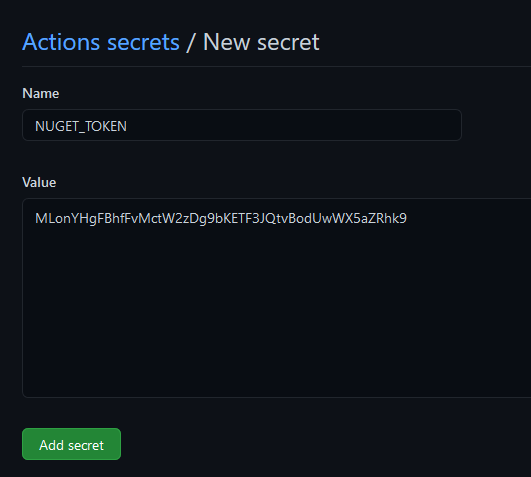
On the page that opens, type in the name of the secret - we’ll use NUGET_TOKEN in this guide. In Value field, paste the token you copied from nuget.org. Once done, press “Add secret”.
Creating an Action file
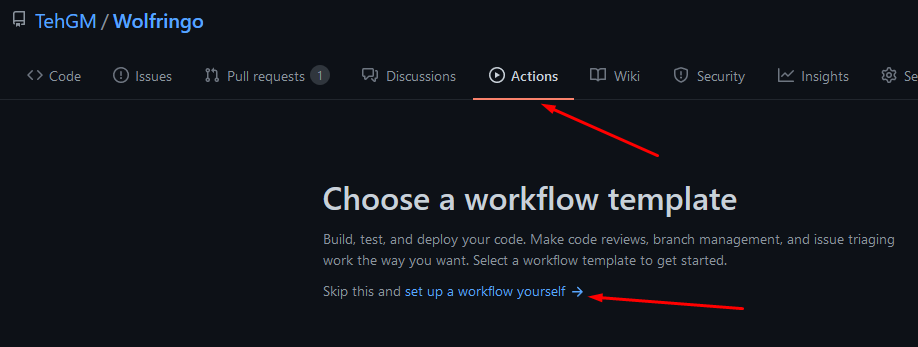
Actions are configured as .yml files, and reside in .github/workflows/ directory in your repository. You can create the file manually, but let’s use GitHub menus to create the file in a correct location for us. In your repository, press Actions button. GitHub automatically suggests some pre-defined Actions templates, but for this tutorial, let’s click set up a workflow yourself link.
GitHub will display a template for a default workflow - you are welcome to edit it, or remove everything and start fresh.
Naming your action
Your action needs a name - you can name it whatever you want, but I suggest using a name that will help you understand what the action does just from the name alone.
| |
You probably want to rename the .yml file as well:

Selecting when to run
Actions can be triggered by numerous events, but for this action, I’ll make it runnable only manually, through Actions tab.
| |
Of course you can use any event you want - see Events that Trigger Workflows for a list.
Creating a job
GitHub Actions can have multiple jobs running in parallel, or one after another if you use needs option. For our example, we’ll use just one job - let’s name it nuget-publish.
| |
Steps
GitHub Action job runs in steps, which always run one after another. This way, we can get everything installed etc before we build the package and publish it.
All steps should be inside of our job object.
| |
Step 1 - Checkout
The first step is to get all of our project code onto virtual machine. This is easy to do using predefined checkout action.
| |
Step 2 - Install .NET Core
The 2nd step is to install .NET Core. Luckily there is already a predefined action for that called setup-dotnet, so we don’t have to run series of commands.
In this action we also set nuget source and auth token we created just before starting to create our action. This is important, as without it GitHub Actions will complain. We can override them later on a per-push basis if needed.
| |
secrets.GITHUB_TOKEN instead.Step 3 - Install dependencies
Now with .NET Core installed, let’s run a command to restore the dependencies that your package has. This is optional if you pack the package without --no-restore flag, but it is recommended to include this flag in CI/CD workflows.
To install dependencies, we simply run dotnet restore command in the step:
| |
Step 4 - Publish the package
Now we just have to actually pack and publish the package. To do so, we run a few commands:
| |
Whoa, so there’s a lot to unpack (no pun intended!) here. Let me explain each of these commands.
mkdir __outcommand creates a temporary “__out” folder. This isn’t really a requirement, but it helps with keeping everything categorized, knowing where the packages go, and lets us clean up - which will be important if you want to use your action to publish multiple packages.dotnet packcommand builds our solution and creates a package for each project.-c Releasetells .NET compiler to use Release configuration.-o __outcauses the packages to land in “__out” folder.--no-restoreskips restoring packages because we already did that in Step 3.dotnet nuget pushis where the publishing actually happens. The"./__out/*.nupkg"simply tells the command to publish each .nupkg file that currently exists in our “__out” folder.--skip-duplicateflag will cause the command to skip publishing if a package with the same name and version is already published, which will let us run the Action safely even if we already ran it for this package version.--no-symbols truewill skip generating symbols files (.snupkg) - this is really important, cause if we don’t skip and symbols don’t get generated, removing “__out” folder will fail, making the Action fail as well. Lastly we pass in our auth token using--api-key ${{secrets.NUGET_TOKEN}}- for some reason this is required even though we already set it using in Step 2.rm -rf __outwill remove the temporary “__out” folder and all of its contents.
--source <url> to dotnet nuget push command.Using that argument, you can also publish to multiple NuGet repositories at once - simply duplicate
dotnet nuget push line, and use different source + api-key combo!${{secrets.NUGET_TOKEN}} to ${{secrets.GITHUB_TOKEN}}Publishing Metapackages
You can use this action to publish Metapackages (using .nuspec files), too - but the Publish Step step will need a small change.
Replace dotnet pack command with nuget pack command:
| |
"MetapackageFolder/Metapackage.nuspec"is the path to your .nuspec file - I tend to put them in a separate folder to avoid any issues when packing.-Exclude "*.*"excludes all files that might reside in the same folder as .nuspec file. If it’s not a metapackage or otherwise undesired, simply remove that argument.-BasePath "MetapackageFolder"sets base path for the command to be the same as .nuspec file folder. Remove it if your .nuspec file isn’t in a separate folder.-NonInteractivedisables all prompts - we can’t interact with them in GitHub Actions anyway, and they could halt the step!-OutputDirectory __outcauses the package to land in “__out” folder.
The Action so far
That was rather easy, don’t you think? The action so far should look more or less like this:
| |
Selecting Projects to Publish
Now bear with me for a moment - this action will be good enough when you have only one project in your solution, or your solution has multiple projects but you want to publish them all. If that’s the case, you can go to Saving Action and enjoy your action now!
But in many cases, you don’t want to publish all projects, or at the very least you want to control when to publish specific projects, so read on!
Excluding Projects completely
You can exclude projects completely by using dotnet sln remove command. To do it, add a new step to your Action, preferably just before Step 3. For example, my libraries tend to have “Examples” folder where example projects reside - I definitely don’t need these to be published to NuGet!
| |
Manually selecting projects
Excluding projects completely is great and will fulfill most “excluding needs”, but we can go a step further - we can individually select the projects we want to publish. To do this, we’ll use Manual triggers inputs feature of GitHub Actions.
workflow_dispatch). If your action uses different trigger events (for example, on push or pull_request) this unfortunately is not a feature for you.You need to add a separate input for each of your projects that you want to publish. Let’s assume your solution has 2 projects: MyLibrary and MyLibrary.ExtraStuff. With these 2 libraries, you’d modify the beginning of the action as follows:
| |
Now we also need to modify 3 things in Step 4: we need to change its name, specify the project in dotnet pack command, and add an if condition that will check whether the step should run.
| |
Now just copy this updated step, and paste it right after - of course change name and project pack to “MyLibrary.ExtraStuff”, and name of the input check to publishExtraStuff.
Updated Action
Let’s revisit our complete Action. It should look more or less like this:
| |
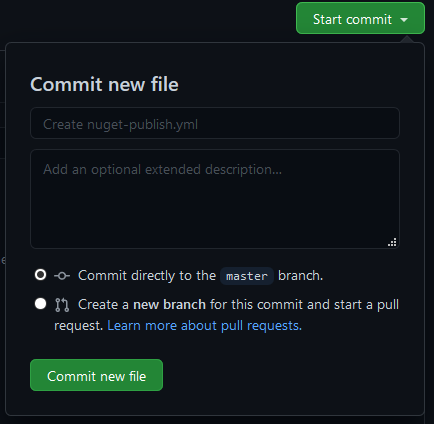
Saving Action
You can go ahead, and press Start commit. You can name your commit, and select whether it should be commited directly to master, or started as a pull request.
Testing the action
Finally the time to test your action out! Go to Actions tab in your repository, and select your new NuGet Publish workflow. Then, press “Run workflow” button.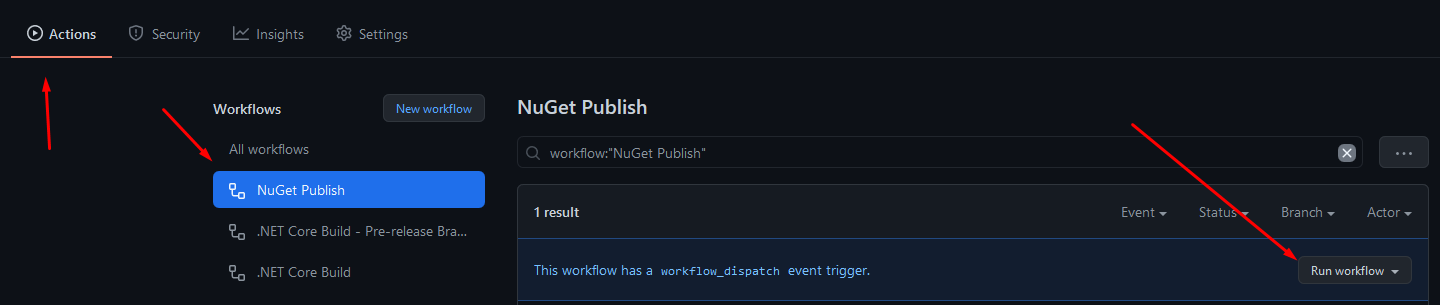
This button will open a pop-up. Here you can select the branch to run the Action from, and if you added any inputs, you can type in the values. Once happy, press a green “Run workflow” button on the bottom.
After a short moment, a workflow run should appear on the list. You can click its name and then big button with job name to view the progress.

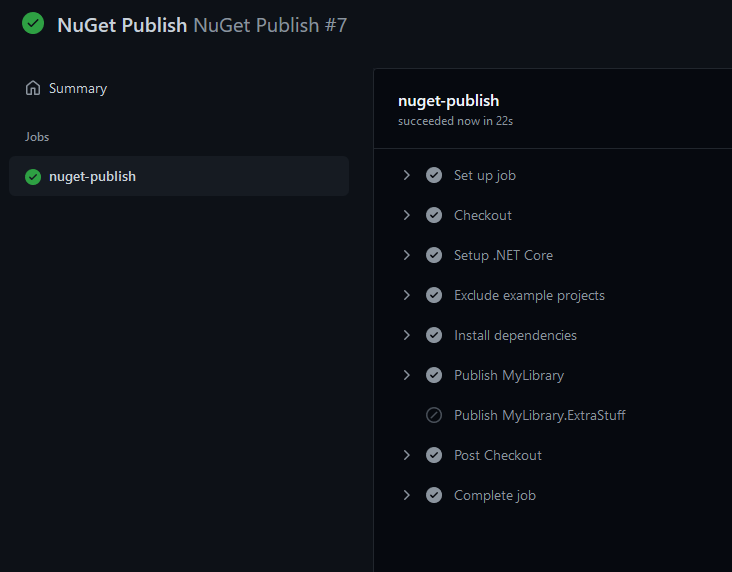
Once the Action finishes executing, your package should appear on the NuGet repository of your choice!
Summary
Congratulations! You now know how to automate your NuGet package publishing with GitHub Actions!
Granted, it still requires a button press (unless you choose a different trigger, but I personally wouldn’t), but this is just a button press instead of series of terminal commands. I personally created this Action for my library Wolfringo, which is a set of 6 NuGet packages - this GitHub Action makes publishing of new versions much much less tedious!